

Is there a slope in your yard? Find out about the landscaping technique that may help prevent soil erosion and assist beautify your backyard all at the same time, and how simple it can be to do it yourself if you have the correct materials.
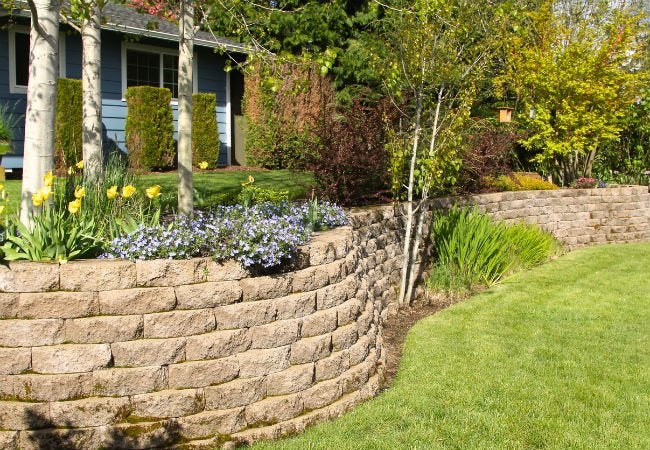
Retaining walls can serve a variety of objectives, including preventing soil erosion, transforming steep slopes into terraced backdrops, and developing focal points within the environment. In point of fact, they are some of the most typical solutions to the issues that are generated by geographical features such as hills. When properly constructed, retaining walls can convert steep slopes into garden space that can be utilised in a variety of ways.
In spite of the fact that these walls have a straightforward appearance, maintaining their shape calls for a significant amount of planning and, in some cases, skilled engineering. The weight of the soil increases significantly when it is wet from recent precipitation. A simple retaining wall that is 4 feet tall and 15 feet long might have to withstand up to 20 tonnes of pressure from the soil. The weight of the structure exerts a significant additional force on the ground with each additional foot of height. If you get your building plans wrong, you could wind up with a weak wall that has the potential to bulge or, even worse, collapse completely. For this specific reason, the design and construction of retaining walls that are higher than four feet should be left to the experts.
However, eager do-it-yourselfers who have a working grasp of construction can construct shorter retaining walls on their own. Does that describe you in any way? These instructions for building a retaining wall will get you off to a good start if you want to get your hands dirty and enhance your landscape by creating a retaining wall.
DO NOT IGNORE the importance of checking with the relevant authorities.
Because the influence that a retaining wall has on the natural flow of water could have an impact on your neighbours, several municipalities demand that homeowners get a permit before construction can begin on their homes. In order to verify that the construction of a retaining wall will not result in drainage issues, you might be required to present drawings for your wall and arrange for a property inspection.
Calling the countrywide service DigSafe (811), which will inform local utility companies that you plan to dig, is something else you should do while you're already on the phone. These can identify whether their underground wires will be an obstruction and record the specific locations of where they are located.
DO choose a material for the walls that will be simple to work with.
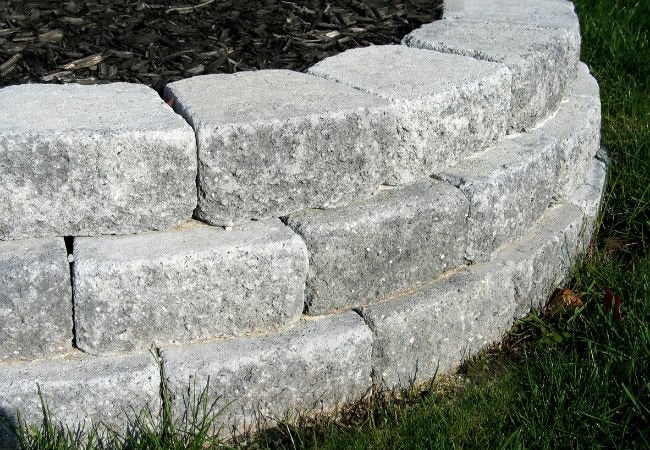
There is a wide range of materials that can be used to make retaining walls, ranging from natural stones and bricks to poured concrete and railway ties that have been treated with pressure. A locking flange along the bottom edge of the manufactured block creates a secure attachment between rows, making it an excellent choice for do-it-yourself retaining wall projects that call for the use of manufactured blocks. You can find these blocks (which are available in grey and earthy tones with textured or smooth faces, like these Belgard retaining wall blocks) at practically any home improvement store as well as many garden centres.
related link: What You Can Do to Get Rid of Honeybees in Your Home Without Killing Them
BE SURE to begin with a solid groundwork.
Your retaining wall's strength will be directly proportional to that of its support system. A trench that is filled with three inches of crushed rock and is surrounded by a stacked-block retaining wall that is no higher than four feet in height will assist protect the wall from shifting and settling. The suggested height of the wall will determine the actual depth of the trench; however, you can use this guideline as a general rule: Dig a trench that is one eighth of the wall deep and three inches deeper than that. For instance, if you want the finished height of your retaining wall to be three feet (36 inches) tall, you would need to dig the trench eight inches deep to accommodate three inches of crushed rock and approximately five inches (or an eighth of the visible retaining wall) to start the wall below grade. This would bring the total depth of the trench to twenty-four inches.
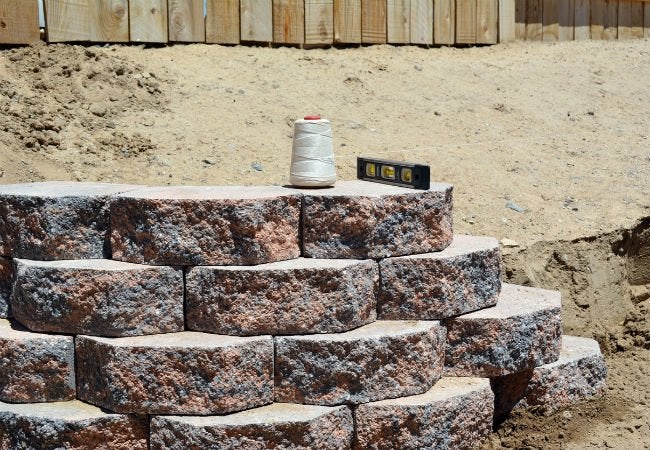
A surface that isn't level is NOT appropriate for laying blocks on.
Since the first course, also known as the first row of blocks, sets the stage for the rest of the wall, ensuring that it is absolutely level is of the utmost importance. If it isn't, succeeding rows won't be level either, which will result in a retaining wall that is unbalanced and ugly. If it is, subsequent rows will be level. Before you begin laying the first course of blocks, check to see that the gravel layer below the first course of blocks is level by using a carpenter's level that is 4 feet long, such as the 48-inch aluminium level sold by Craftsman. Any inconsistencies that exist here will be visible further up the wall.
DO arrange the blocks with a tiny incline in the other direction.
If a wall is constructed in such a way that it leans into the soil that it is retaining, the wall will be less likely to be pushed outward by the pressure exerted by the soil. Make sure that your retaining wall slopes at a minimum rate of one inch for every one foot of rise (height) when you design and build it. The use of retaining wall blocks, on the other hand, makes this "step-back" building a very simple and straightforward process. It is impossible for the top blocks to be pushed inward because of the locking flange that is located on the bottom edge of each block. This flange directs the block to click into position slightly behind the lower block.
NEVER overlook the need to provide provisions for drainage.
Retaining walls have a natural adversary in the form of groundwater. Clay-type soils swell when they are saturated with water, which causes the soil behind a wall to be subjected to an excessive amount of pressure. If you want to avoid having to fix a retaining wall that has failed, you should establish drainage measures while you are building the retaining wall. The required escape route for groundwater can be created by backfilling the gap behind the blocks with crushed stone and then placing a flexible perforated drainpipe, sometimes known as "drain tile," at the base of the wall. This creates a pathway for groundwater to escape. Groundwater will be transported through the perforated pipe to each end of the wall, where it will then drain away. After that, the ends of the drainpipe should exit on each end of the wall, and you may disguise their look by covering them with crushed stone.
Backfill in the correct manner.
When you are through installing the drainpipe, you should fill the remaining space behind the blocks with either sand or pea gravel before you backfill the area. In either case, water will be able to seep through and make its way to the drainpipe at the foot of the wall. After you have laid each course of blocks, backfill the area with a few inches of the material, and then use a hand tamper to compact the area. This will produce the best possible results. You can ensure that the backfill is packed tightly by tamping it about every six inches. This will give additional support from the pressure of the soil that is behind the wall.
Sliding Center- construct works are in progress for the track gutter,retaining walls,main buildings of the complex http://t.co/3wrBhi0
— Dmitry Chernyshenko (@DChernyshenko) August 16, 2011
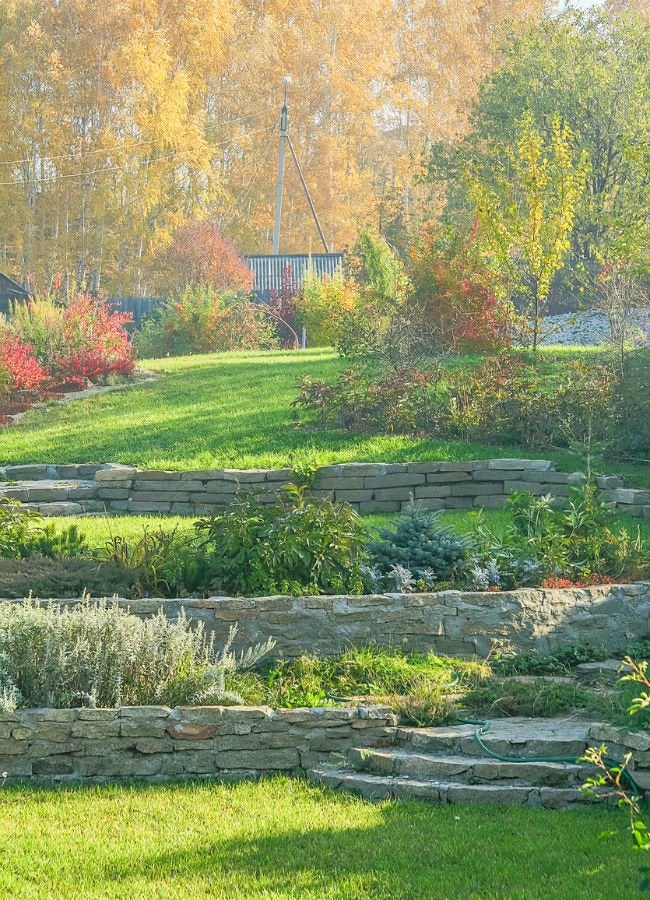
DO NOT construct a single towering wall when you have the option of building many walls with staggered heights instead.
It is recommended that retaining walls taller than four feet be constructed by professionals; nevertheless, it is possible to engineer a solution for a steep slope on your own by building two or more shorter "tiered" retaining walls as opposed to a single tall wall. This will allow the slope to be contained more effectively. A sequence of short walls adds aesthetic texture to the landscape, and because each individual wall will carry a smaller amount of soil weight, the likelihood of the walls collapsing is reduced. When constructing a series of tiered retaining walls, place the wall with the higher height behind the wall with the lower height at a distance that is equal to two times the height of the wall with the lower height. If the lower wall is 3 feet high, for instance, the higher wall should be put back at least 6 feet from the lower wall. Because of this, the one on top will not exert any pressure on the one below it.